We left off with all new electrical in the bathroom, and a vent pipe moved. The vent pipe had to be moved for the electrical, so the new vanity light could go where it needed to go to be centered. You can see the newly moved black vent pipe and the new light locations below. The light on the left has a new fixture already installed, and the one on the right doesn't. It simply has the bracket and mounting hardware, since we knew we would have to remove the light again as soon as we put up sheetrock. The one on the left is installed temporarily so we had some sort of light while we worked.
Although we were thankful to have all of these problems solved, a new problem was discovered. Unless we seriously rerouted some pipes, we could not have the mirrored medicine cabinets I picked out. After much discussion, we opted to leave the pipes as they were, and purchase a new vanity that would be configured to double sinks for better storage, and use flat mirrors without medicine cabinets.
I was honestly not pleased at all about that at first. I thought our vanity was fine, and it was a shame to buy a new one. But, we forged on and shopped around and purchased a shiny new vanity online, and had it shipped to our local store. The vanity has drawers in the middle and cabinets on the outside, so it is better suited for double sinks.
When we got the vanity in, we placed it in the bathroom just to see, and it was stunning. I withdraw any negative thoughts or comments I had on purchasing a new vanity because it is a million times nicer than what was in there. The craftsmanship is stunning, it's professionally finished, the layout is better, and it even has soft close drawers. My favorite feature might be all of the trim and molding- it looks more like a furniture piece. I'll show that soon.
Unfortunately, it presented a new problem. I'm learning that in (major) DIY, things almost never go as you planned. The new problem was that now there were different pipes that needed to be moved. The drain pipe and water pipe both intersected with the drawers in the new vanity.
In the photos you can see that the two pipes on the left interfere with the drawer area. When we purchased the piece, we thought there would be enough room behind the drawers, but there just isn't.
Due to being in a rush to complete the bathroom, mostly due to our baby on the way, Jake suggested just hiring a plumber to move the pipes. I called over 14 plumbers and contractors, and no one could get it done. That is a story for another day, but I can simply say, I am incredibly disappointed so far with my personal experience with contractors/plumbers.
Even though these particular plumbing issues were things Jake had never dealt with before, he decided to attempt it after our negative experience with contractors/plumbers. As I mentioned in my 29 Thoughts on Thankfulness post, this is one of the things I love most about him. He can literally do anything that he puts his mind to. Anything. He will work hard and figure it out. And, the proof is in the pudding! It took him a couple of nights but he got the pipes moved. The time he spent was only an hour or so, but the pipes were so old that it took several soaking sessions with WD40.
You can see in the photos the pipe to the far left was routed to go straight out, and the middle pipe was rotated to also go straight out. With these changes, our vanity now works in place! Next up, drywall.
Showing posts with label Reno. Show all posts
12/11/14
12/10/14
Full Bathroom Reno: Electrical, Vanity, and Moving a Vent Pipe
As I mentioned in the last bathroom post, I didn't get detailed photos of all of the steps due to baby on the way. A lot of these steps were taken when I still was not feeling well, so my thought process was not on taking photos and documenting!
Once we decided to remove the mirrors, Jake asked his brother-in-law to help. His brother in law works in glass and mirrors, so he would be able to remove it much safer than we could. He came over and removed them pretty quickly, and we were left with a very ugly wall. I wish I had pictures of the wall at this point, but imagine it with huge 5 inch diameter glue spots and chunks of drywall missing. We also discovered that there used to be two medicine cabinets, one in the middle and one on the left side wall, as there were holes for them in the drywall.
At this point, the only option was to completely remove the existing drywall and replace it. It was just too damaged. On the bright side, this meant it would be a lot easier to install new electrical. I asked my dad to help with the electrical, since Jake nor I had done it before, and he was very experienced.
He came over and installed two new outlet boxes, quadrupling our number of outlets in the bathroom. We had just one single outlet with two plugs, and he had the brilliant idea of making each outlet four plugs, in addition to adding the new outlet box. I was so excited I was jumping around with glee! He also replaced our vent fan, which has never worked since we moved in. It worked, I suppose, but it made this horrendous noise when you turned it on, so we just never used it. He also updated the light switch and vent fan switch to more modern rocker switches. I have a difficult time saying what I was most excited about- probably all of it. I switched the vent fan on and off for days just to listen to the quiet hum. Also, now all of our outlets were a new, crisp, clean white, as opposed to the older almond color.
The next step was to convert the single vanity light into a double vanity light, which had it's own set of problems. As with all DIY projects, you never know what's lurking behind the walls. In this case, we had a vent pipe in the way.
Once we decided to remove the mirrors, Jake asked his brother-in-law to help. His brother in law works in glass and mirrors, so he would be able to remove it much safer than we could. He came over and removed them pretty quickly, and we were left with a very ugly wall. I wish I had pictures of the wall at this point, but imagine it with huge 5 inch diameter glue spots and chunks of drywall missing. We also discovered that there used to be two medicine cabinets, one in the middle and one on the left side wall, as there were holes for them in the drywall.
At this point, the only option was to completely remove the existing drywall and replace it. It was just too damaged. On the bright side, this meant it would be a lot easier to install new electrical. I asked my dad to help with the electrical, since Jake nor I had done it before, and he was very experienced.
He came over and installed two new outlet boxes, quadrupling our number of outlets in the bathroom. We had just one single outlet with two plugs, and he had the brilliant idea of making each outlet four plugs, in addition to adding the new outlet box. I was so excited I was jumping around with glee! He also replaced our vent fan, which has never worked since we moved in. It worked, I suppose, but it made this horrendous noise when you turned it on, so we just never used it. He also updated the light switch and vent fan switch to more modern rocker switches. I have a difficult time saying what I was most excited about- probably all of it. I switched the vent fan on and off for days just to listen to the quiet hum. Also, now all of our outlets were a new, crisp, clean white, as opposed to the older almond color.
The next step was to convert the single vanity light into a double vanity light, which had it's own set of problems. As with all DIY projects, you never know what's lurking behind the walls. In this case, we had a vent pipe in the way.
In the photo above, the black vent pipe had already been moved. The issue was the vent pipe came straight down where the arrow points, instead of curving to the left. Jake and my dad managed to move the pipe over one stud, to allow for the vanity light to be centered.
The processed described in this post took a few different days to complete, but boy is it all worth it!
Labels:
Demo,
DIY,
Full Bathroom,
Home,
Reno
12/1/14
Full Bathroom Reno: Sealing Tile and Installing Shower Hardware
This post is very delayed as this part of the project was finished months ago, but thanks to baby on the way, you are getting it now! Better late than never, right?
We left off with a freshly tiled and grouted shower that needed to be sealed and finished. I personally sealed the tile (pre-pregnancy!) myself, so I did not get any photos. There is nothing to show really, since the sealer is clear. You simply brush it on with a paintbrush, being sure to cover all pieces of every single tile. I followed the package instructions, which said to brush it on and wipe it off after a certain amount of time. It's a fairly easy process, except our incredibly uneven natural stone offered a lot more angles and edges than typical tile. I still say it's worth it!
Next, Jake caulked around the ceiling and tub, which I don't have pictures of either. He is a much better caulk-er than me, so I asked him to do this step since this caulk would show at the end result. I chose white caulk for the ceiling and tub surround, since both were white.
Then, Jake installed the shower/tub hardware, which included the showerhead, handle, and tub faucet. The pipes were already in place, so this step was simply assembling it all. Again, our tile selection presented a challenge of being uneven, which made the hardware not sit flush against the wall. Long term, that could cause a big problem with water leakage, mold, etc. Thankfully, we asked my dad and he suggested filing it down. He actually came over and helped Jake with this, and they were able to get all of the pieces to sit flush. Then, Jake finished them with clear caulk. He was the one who thought clear would be better, and I am so glad I listened to him. The clear looks amazing! The white would have been very obvious around that natural stone and dark hardware.
Finally, we have the finished product.
You can see in some of the photos of the shower wall with the hardware that the wall is not finished next to it. Both walls next to the tile still need to be finished, but we will do that step last, when we do all of the finishing, painting, etc.
I love the hardware I chose. It's a dark oil-rubbed bronze, which really pops off the natural stone shower. It has these gorgeous sparkly flecks in it, too. I really love the gooseneck shower head and the handle- it reminds me of an oil pump- which is a fond thought for this Texas girl.
Right now, I have up a simple oil-rubbed bronze rod with just a white shower curtain liner. We have been using the shower since late July when it was finished, and it has been heavenly. It is so much lighter and brighter in there with the new tub and tile, and it such a pleasure to use. For the first month, easily, I would just stare at the beautiful tile as I showered. I am so pleased with all of our choices and so proud of the fact that we did it 100% ourselves.
I don't have any good pulled back photos, because of the size of the bathroom and my lacking photography skills. I need to have someone over to take good photos of the shower for me. Still, you can see the difference, right?
Before:
After:
We just love it!!
Check out all of the shower renovation steps by clicking on the orange "Full Bathroom" link under this post.
We left off with a freshly tiled and grouted shower that needed to be sealed and finished. I personally sealed the tile (pre-pregnancy!) myself, so I did not get any photos. There is nothing to show really, since the sealer is clear. You simply brush it on with a paintbrush, being sure to cover all pieces of every single tile. I followed the package instructions, which said to brush it on and wipe it off after a certain amount of time. It's a fairly easy process, except our incredibly uneven natural stone offered a lot more angles and edges than typical tile. I still say it's worth it!
Next, Jake caulked around the ceiling and tub, which I don't have pictures of either. He is a much better caulk-er than me, so I asked him to do this step since this caulk would show at the end result. I chose white caulk for the ceiling and tub surround, since both were white.
Then, Jake installed the shower/tub hardware, which included the showerhead, handle, and tub faucet. The pipes were already in place, so this step was simply assembling it all. Again, our tile selection presented a challenge of being uneven, which made the hardware not sit flush against the wall. Long term, that could cause a big problem with water leakage, mold, etc. Thankfully, we asked my dad and he suggested filing it down. He actually came over and helped Jake with this, and they were able to get all of the pieces to sit flush. Then, Jake finished them with clear caulk. He was the one who thought clear would be better, and I am so glad I listened to him. The clear looks amazing! The white would have been very obvious around that natural stone and dark hardware.
Finally, we have the finished product.
You can see in some of the photos of the shower wall with the hardware that the wall is not finished next to it. Both walls next to the tile still need to be finished, but we will do that step last, when we do all of the finishing, painting, etc.
I love the hardware I chose. It's a dark oil-rubbed bronze, which really pops off the natural stone shower. It has these gorgeous sparkly flecks in it, too. I really love the gooseneck shower head and the handle- it reminds me of an oil pump- which is a fond thought for this Texas girl.
Right now, I have up a simple oil-rubbed bronze rod with just a white shower curtain liner. We have been using the shower since late July when it was finished, and it has been heavenly. It is so much lighter and brighter in there with the new tub and tile, and it such a pleasure to use. For the first month, easily, I would just stare at the beautiful tile as I showered. I am so pleased with all of our choices and so proud of the fact that we did it 100% ourselves.
I don't have any good pulled back photos, because of the size of the bathroom and my lacking photography skills. I need to have someone over to take good photos of the shower for me. Still, you can see the difference, right?
Before:
After:
We just love it!!
Check out all of the shower renovation steps by clicking on the orange "Full Bathroom" link under this post.
Labels:
Before and After,
DIY,
Full Bathroom,
Home,
Reno
6/24/14
Full Bathroom Reno Day 18: How to Grout with a Grout Bag and Paint the Shower Ceiling
You may have noticed a lack of bathroom renovation posts here on the blog, and that's because we haven't worked on it for nearly a couple of weeks, for extenuating circumstances. We got back to work on it today, though.
We started to put up the pencils, which if you're not familiar, they look like this. But, due to the nature of our uneven natural stone, they weren't lining up. The idea of a pencil is to act as a trim, making a straight even line around the uneven natural stone. But in our case, it wouldn't have been even so we decided not to go through with it. Instead, we are going to finish the edges with caulk, like a typical shower surround.
Next, we decided to fill in a gap near the ceiling on one of the tiled walls.
On the other two walls we tiled up to the ceiling, but on this first wall we stopped a little short. It was the first wall we did, and we assumed we needed to leave room for caulk, but it was a bit too much room. So, Jake cut tiny slivers of the tile and we filled in the gaps with those.
We let the thinset dry, then we grouted the two corner lines. We decided to use a grout bag, to pipe it in the cracks easier. We chose unsanded grout, because our lines were less than 1/8".
We mixed the grout per instructions, but I will note that if you're using a grout bag, it's a lot easier if the grout is more on the runny side. We did one seam with grout that was a thicker consistency, and one with grout that was a thinner consistency, and it was a ton easier with the thinner grout. With the grout bag, you simply pipe it into the cracks just like you were icing a cake.
After we grouted the seams, we smoothed it with these caulk tools to great a nice line.
In these photos the grout is reading lighter than it reads in person. In person, it blends beautifully.
After we grouted, I painted two coats on the ceiling of a water and mold resistant paint. In hindsight, it would have been a lot smarter to paint it before we tiled, but live and learn.
We were ready to seal the tile, but I read on the instructions that you must wait 72 hours after any grout application to seal it, so we are waiting. After that, we can caulk around all of the edges, secure the hardware, and be done! Yay! I'm very happy to be at this point.
We started to put up the pencils, which if you're not familiar, they look like this. But, due to the nature of our uneven natural stone, they weren't lining up. The idea of a pencil is to act as a trim, making a straight even line around the uneven natural stone. But in our case, it wouldn't have been even so we decided not to go through with it. Instead, we are going to finish the edges with caulk, like a typical shower surround.
Next, we decided to fill in a gap near the ceiling on one of the tiled walls.
On the other two walls we tiled up to the ceiling, but on this first wall we stopped a little short. It was the first wall we did, and we assumed we needed to leave room for caulk, but it was a bit too much room. So, Jake cut tiny slivers of the tile and we filled in the gaps with those.
We let the thinset dry, then we grouted the two corner lines. We decided to use a grout bag, to pipe it in the cracks easier. We chose unsanded grout, because our lines were less than 1/8".
We mixed the grout per instructions, but I will note that if you're using a grout bag, it's a lot easier if the grout is more on the runny side. We did one seam with grout that was a thicker consistency, and one with grout that was a thinner consistency, and it was a ton easier with the thinner grout. With the grout bag, you simply pipe it into the cracks just like you were icing a cake.
After we grouted the seams, we smoothed it with these caulk tools to great a nice line.
In these photos the grout is reading lighter than it reads in person. In person, it blends beautifully.
After we grouted, I painted two coats on the ceiling of a water and mold resistant paint. In hindsight, it would have been a lot smarter to paint it before we tiled, but live and learn.
We were ready to seal the tile, but I read on the instructions that you must wait 72 hours after any grout application to seal it, so we are waiting. After that, we can caulk around all of the edges, secure the hardware, and be done! Yay! I'm very happy to be at this point.
Labels:
DIY,
Full Bathroom,
Home,
Reno
6/12/14
Full Bathroom Reno Day 17: How to Tape and Float Waterproof Sheetrock
We left off with all of the stacked stone tiling complete, but before we installed the finishing trim pieces of tile, we needed to float the sheetrock next to the tile.
We needed to float both sides- the side with the shower hardware to make an even surface, and the back side to make it flush with the existing sheetrock. We used joint compound and paper joint tape.
The first step was to apply the joint compound over the sheetrock with a putty knife.
Then, we smoothed the joint compound with a flat trowel. It would be ideal to use a squared or rectangular trowel for this, but we just used what we had.
Then, we applied the joint tape over the smoothed joint compound. Be sure to apply it correct side up, or it will bubble and crease once it's dry.
Next, we applied more joint compound over the tape with a putty knife.
And finally, we smoothed that layer of joint compound, making sure to create an even surface.
Meanwhile, my sweet faithful pup stood by and watched. He's really been wondering what we're doing spending all of our time in the bathroom and not spending it sitting on the couch cuddling with him!
Doing this floats the area and creates a smooth and even work surface for us.
Next up, pencils. Then grouting the corners and sealing it. We're getting closer!
Labels:
DIY,
Full Bathroom,
Home,
Reno
6/10/14
Full Bathroom Reno Day 16: Measuring, Cutting, and Installing Stacked Stone Tile
Last week, Jake finished tiling the back wall of the shower while I was doing a girls night at a Backstreet Boys concert. Sounds a little silly, I know, but it was so much fun!
While I was there, I didn't pay any attention to my phone thanks to all the singing and dancing, except to take pictures, but when I left, I saw a text from my sweet hubby that was two images:
Ahh! It was almost done! More girlish screaming commenced, internally at least. When I got home, he had just finished tiling the back wall. I jumped up and down and hugged him and profusely thanked him- which turned into me hugging the shower too. Jake grabbed the camera and started snapping. It all seems a little silly now, but you can see the sheer joy captured on my face!
2. Measure the space vertically and horizontally to prepare for tile cuts.
4. Cut the tile with the wet saw on the marked lines.
5. Hold up the tile to the space to ensure a fit. If not cut perfectly the first time, mark those spaces and re-cut.
6. Press the cut-to-size tile into the thinset. Press each individual rectangle if using stacked stone. Wipe away any thinset that squeezed out of the cracks before it dries.
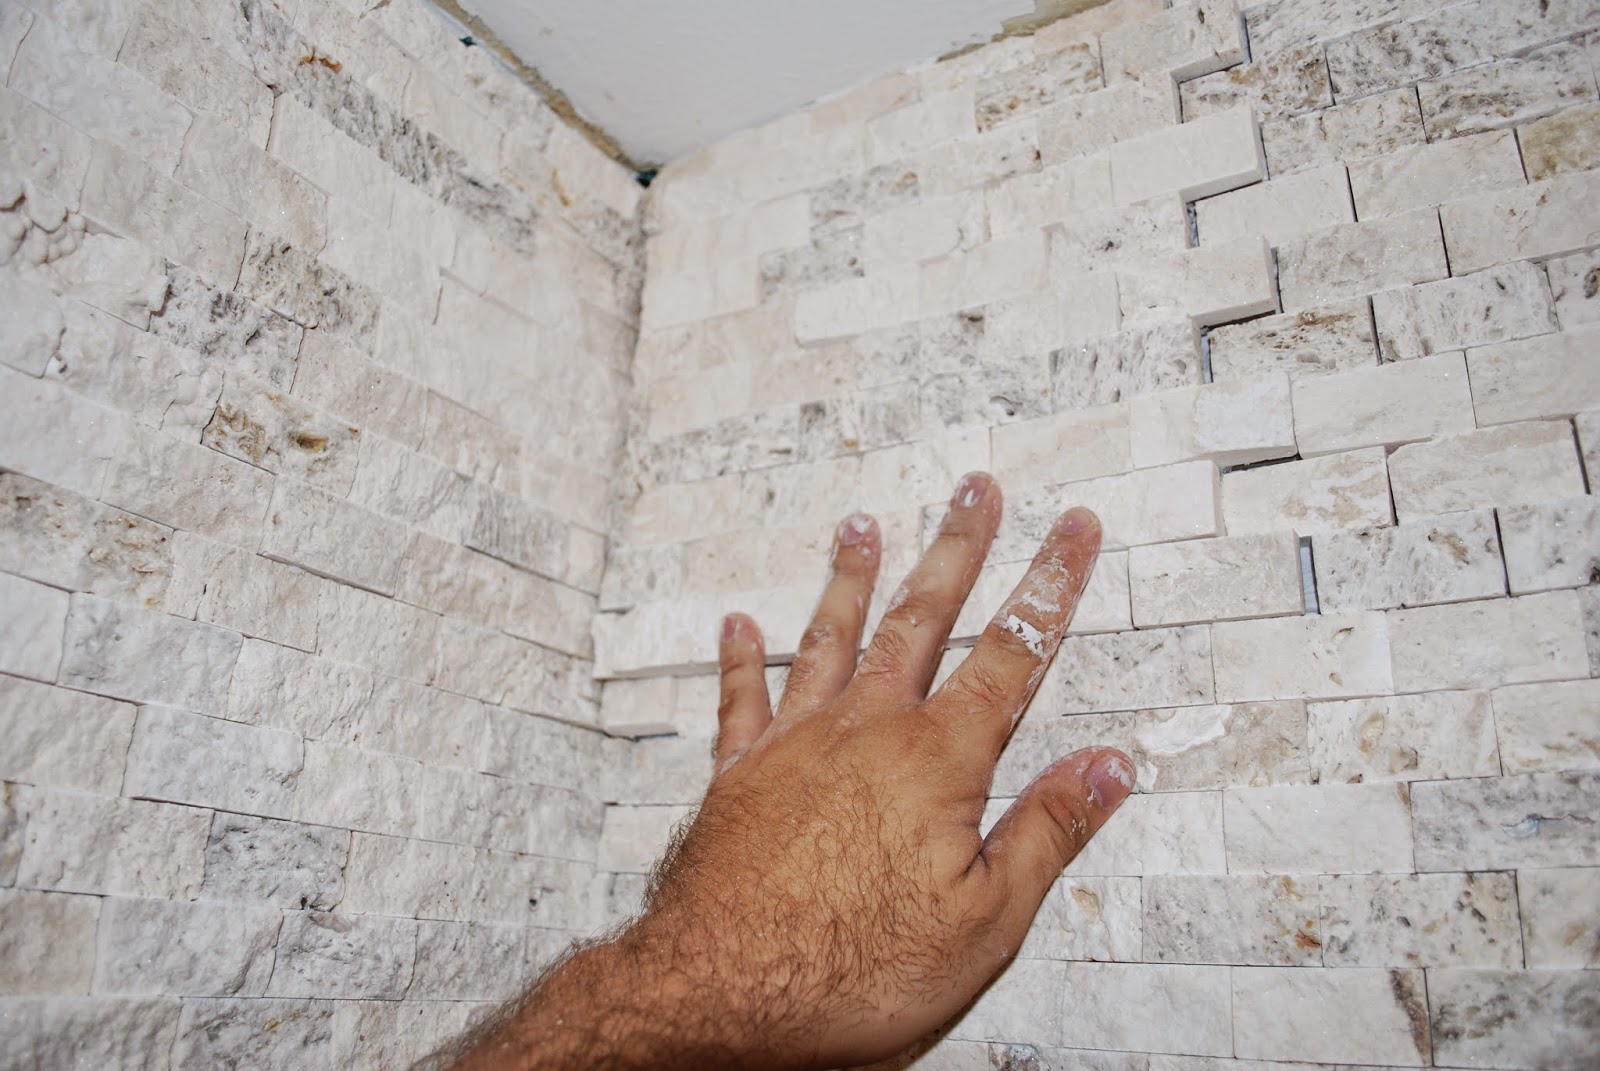
A note: on edges, try to cut the tile as closely as possible when using stacked stone. The corner gaps will be filled in with grout, but you'll want as thin of a grout line as possible for aesthetics. Jake noticed larger gaps than desired in some areas, so he filled those in with tiny cut stone pieces and secured them with thinset.
The stacked stone tile is done! We still need to grout the seams, caulk, and lay the finishing pencil pieces, but the bulk of the job is done.
Then, he started to install the showerhead, faucet handle, and tub faucet. To do this, he used plumbers tape to wrap around the pipes, and screwed in the hardware. We still need to secure them and caulk them, but we're another step closer!
While I was there, I didn't pay any attention to my phone thanks to all the singing and dancing, except to take pictures, but when I left, I saw a text from my sweet hubby that was two images:
Ahh! It was almost done! More girlish screaming commenced, internally at least. When I got home, he had just finished tiling the back wall. I jumped up and down and hugged him and profusely thanked him- which turned into me hugging the shower too. Jake grabbed the camera and started snapping. It all seems a little silly now, but you can see the sheer joy captured on my face!
The camera was already in the bathroom, because Jake was incredibly thoughtful and captured each step of his process for that night. He knew how important it was to me, and how I had been photographing each minute detail, so he took care in snapping everything. I adore that man more than I can possibly say.
He tiled the remaining 3 or 4 rows from when we last left off, but took shots of placing the last tile. From here on out through the rest of the post, I'll list out in steps what he did. He did such a great job taking photos, I don't think I even need to narrate, as they speak for themselves.
1. Apply thinset to the cement board and notch it to prepare for tile.
2. Measure the space vertically and horizontally to prepare for tile cuts.
3. Measure and mark the tile according to the space measurements. Be sure each mark is facing the right way on the tile- horizontally or vertically.
4. Cut the tile with the wet saw on the marked lines.
5. Hold up the tile to the space to ensure a fit. If not cut perfectly the first time, mark those spaces and re-cut.
6. Press the cut-to-size tile into the thinset. Press each individual rectangle if using stacked stone. Wipe away any thinset that squeezed out of the cracks before it dries.
A note: on edges, try to cut the tile as closely as possible when using stacked stone. The corner gaps will be filled in with grout, but you'll want as thin of a grout line as possible for aesthetics. Jake noticed larger gaps than desired in some areas, so he filled those in with tiny cut stone pieces and secured them with thinset.
The stacked stone tile is done! We still need to grout the seams, caulk, and lay the finishing pencil pieces, but the bulk of the job is done.
Then, he started to install the showerhead, faucet handle, and tub faucet. To do this, he used plumbers tape to wrap around the pipes, and screwed in the hardware. We still need to secure them and caulk them, but we're another step closer!
I'll take and post better photos as we get further in finishing the shower. For now, this is (laughably) the best one of the hardware + tile that I have!
Labels:
DIY,
Full Bathroom,
Home,
Reno
Subscribe to:
Posts (Atom)